Posts Tagged 'DIY'

4th of July Party Recipes + Free Printables


Happy Independence Day yall!
With Fourth of July right around the corner I thought I would share some pictures from our party last year.

Screen Shot 2013-06-28 at 8.54.38 AM
Fruit Flag
– 2 bananas
-1 carton of strawberries
-half a cup of blueberries
-Large Skewers
Chop up your bannanas and strawberries, layer onto the skewers in a”every other” fashion.
On the 6 left skewers leave about 2.5 inches to string your bluberries on.
And VOILA – All American Fruit Flag! Easy Peasy!

559319_10150925743987957_1840138678_n

Screen Shot 2013-06-28 at 8.54.45 AM
4th of July Strawberries
Another easy patriotic snack are dipped strawberries with red white & blue sprinkles. Melt your white chocolate in 30 second intervals. Dip your srawberries and immediatly roll in the blue sprinkls.
557667_10150925743752957_2105161492_n Screen Shot 2013-06-28 at 8.54.28 AM
One of my FAVORITE patriotic accents was the red, white & blue drink. It’s all based on sugar content. I followed this recipe for a fun Holiday Drink Mix! At first I thought all the different flavors were going to taste weird together but they actually made for a very REFRESHING beverage.
Layered Drink Recipe

fourth_july_5x7printable_2
fourth_july_5x7printable
fourth_july_5x7printabl {<—- CLICK HERE to download your FREE PDF}

fourth_july_8x10printable
fourth_july_8x10printable {<—CLICK HERE to download}

Grab a hot dog and light those fireworks and celebrate our nations independence this Holiday week!

Sunshine {Garden Party} Baby Shower


Well Hello there Summertime. It’s been a while.

Made with Love: Outdoor Garden Party
Made with LOVE: Sunshine Baby Shower
FYI this post is VERY detailed with DIY party tips! Feel free to just skip to the pictures (thats what your guna do anyway :))

So as you know, I am a HUGE believer in all things DIY (Do-It-Yourself) & absolutely LOVE throwing parties. It makes my heart so happy!

So when my cousin told me she was pregnant just 8 months ago.. I thought PERFECT! I can throw a summer baby shower.. & O ya Congrats on the baby! (in that order) But yes I am sooooo excited to have another {nephew}. With this being her third and a BOY this time.. I wanted to do something simple yet intimate with just close friends and family.

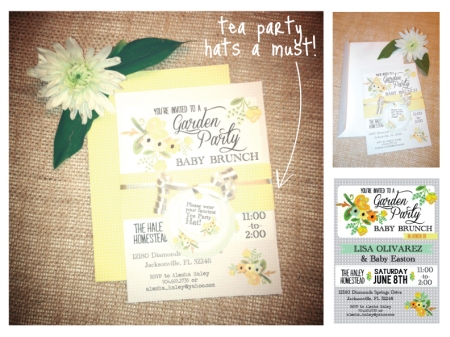
I turned to my handy dandy Pinterest and starting pinning away.. for about 6 months. I know Im obsessed.. I thought about every detail, the flower arrangements, the color, the theme, the decorations, the invitation. Speaking of the invitation, I started with designing that first and based the whole party around it! Yellow & grey were the perfect summer colors and gender neutral. I knew I didnt want to do the typical boy baby shower decor, and with her due date in July, I thought a Garden Party would be the perfect theme! I later thought about the fact that its Florida… In June… & really really really HOT, (unimportant details)
Thank God for air conditioning.. right?!  P.S. the week before the party there was totally a tropical storm in Florida (AH FREAK OUT). But thankfully the day of the party was absolutely beautiful!

Made with Love: Sunshine Baby Shower Invitation Made with Love: Invite Design

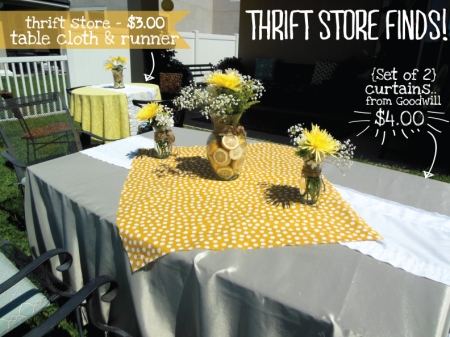
Next I focused on the decorations. First things first, throwing a baby shower doesn’t have to be EXPENSIVE, I repeat.. it does NOT have to be expensive. From someone who has thrown her fair share of baby showers, I always say O Im not going to spend that much?! But then I get sucked in at Target and next thing you know I just had to have the matching placements and cute baby toys for decorations.. and im out a whopping couple hundred bucks! O Target, we have such a Love/Hate relationship.

It was my goal this time to stick to my guns, and do it myself, as much as possible (I later caved in and bought a cake from Costco.. which was TOTALLY against my plan, but my logical thinking sister knew I just wouldn’t be able to do it all.. and guess what.. Sister knows best! She was right, and no one even cared that I didn’t bake the cake… thats another story! Back to the decorations. So for three months I went to every thrift store on Saturday morning, and looked for any party decor I could find, which was basically just the table cloths and fabric, but hey I saved some major moolah! I bought 3 curtains from Goodwill, a yellow tablecoth, and 3 table runners for all around $10.00!
thrift_store

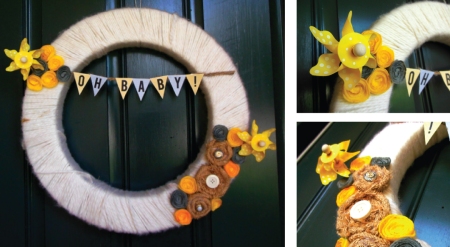
In the interest of saving money, I also created a welcome wreath with pops of yellow. I’ve had this white wreath from a previous party, so I just repurposed it by making burlap/felt flowers.. and a little paper banner! Easy peasy and it set a great tone for the party.
burlap_wreath

IMG_4554

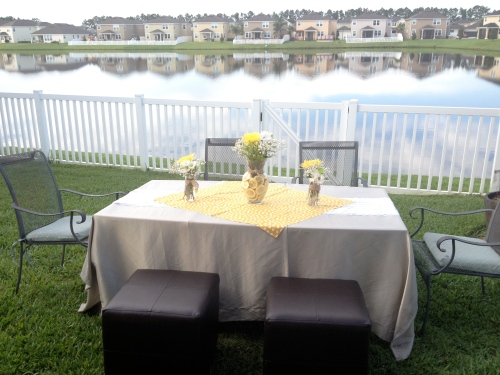
I also LOVED having the tables outside. It was so great and really felt like a garden party! My original plan was to have the food table in the grass as well.. but the patio was really the only shaded area and again in Florida.. Its HOT.. like all the time! I moved the buffet table from my dining room outside to the patio and put the main food on there. I used the third curtain I got from goodwill, as a tablecoth over the buffet table, and I had some left over chevron fabric (purchased from Hobby Lobby) from the flag banner I made.

Baby Shower Food Table: Garden PartyMade with Love: Garden Party
Made with Love: Garden Party
Made with Love: Garden Part
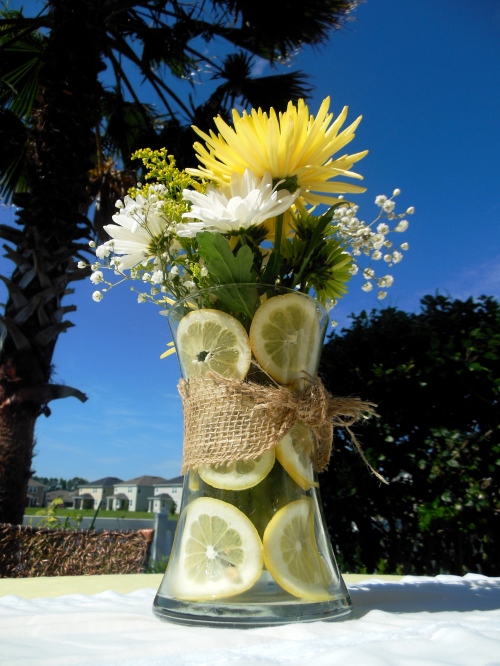
P.S. a bag of lemons at costco is under $5.00 and adds some SERIOUS color and class to the decor.
IMG_4582
Outdoor Table Arrangement for Garden PartyIMG_4543 DSCN0504

I used sliced lemons to line the inside of the vases to create a more dramatic flower arrangement.
TIP: Use a large vase and place a smaller cup/glass inside filled with water for the flowers.
Slice your fruit (lemons, limes, oranges) thinly and place them in between the outter edge of the vase and the smaller glass.
You will have to layer them until they reach the top of the vase.
Next place your boquet in the small glass thats filled with water (you dont want the flowers sitting in acidic water) And your done!
Optional: Tie the vase with burlap or ribbon for a finishing touch!

Made with Love: Garden PartyLemons as Vase Filler in Flower ArrangementsDSCN0503

So aside from the flowers, my next favorite part of the shower was the COFFEE BAR!! OMG I dont know about you but I absolutely LOVE coffee. I seriously go to bed at night just thinking about how excited I am to get up in the morning so I can have coffee.. O you dont do that?!.. Okay maybe thats just me! Regardless I knew I wanted coffee at the shower. And because this was a “Brunch” I knew coffee would be the perfect fit!

Heres another Party Tip, if your a perfectionist / contreal freak like me :)… Be Flexible!
Originally I wanted ALL the food and the coffee bar outside, I had this vision in my head of exactly the way everything was going to look and I wasn’t budging. But the night before, that voice of reason A.K.A my sister, made me realize that noone is going to want to drink HOT coffee outside. HA what great insight! And I knew once again (Man this being wrong all the time is getting old!) that she was right. This is where the “being flexible/ adaptable” comes in handy. Normally I would be okay sure no problem, but my lack of sleep that day and months of planning was making me stress over every detail. But Alas, I knew it would be better if the drinks were inside.  So we set up the coffee bar / beverage station inside. Which was actually perfect, because once everyone ate, we were sweating anyway so we all mingled inside.
IMG_4561
One thing that I always try to do when planning a party is to think about every detail, so a guest can walk in and not have to ask for one thing. That every item that they could possibly need has already been thought about and is easily accessible to them. For example the “Self Serve” coffee bar, I put all the cups, creamer, coffee, and even biscotti’s out on the bar for easy access for guests. You want them to feel at home and comfortable at the party, and not have to ask “O do you have a glass I can use.. OR Do you have silverware” As a host, I want to be able to enjoy the party, and as much as I can get done the night before, it allows me for more time to relax and socialize with the guests.
DSCN0528
The Iced Coffe was a hit! I made a pot of coffee the night before and put it in the fridge, about an hour before the guests arrived I placed it in my super cute mason jar drink dispenser (which I got on sale for $10.00 at Kirkland’s), I added about half a cup of milk and a little bit of flavored creamer.

Now heres a neat trick: I love iced coffee but when the ice melts my coffee gets all watered down UGH.. NO FEAR!!
Take your leftover coffee and place in ice cube trays overnight, thus creating “ice coffee cubes” .
That way when the ice melts it adds more coffee NOT water, genius! Thank you Pinterest.
Made with Love: Iced CoffeeDSCN0582Made with Love: Coffee Bar at Baby Shower
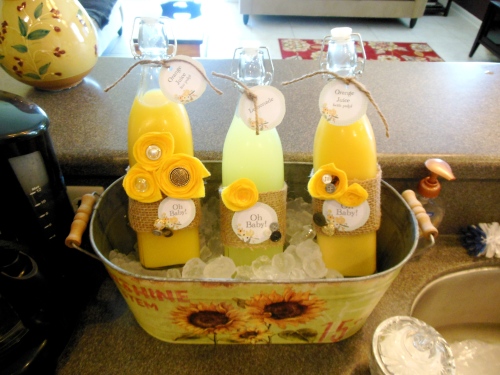
I also had lemonade, orange juice and water if everyone didn’t share my love of coffee. I bought this adorable sunflower aluminum tin, that doubled as a drink station as well as a take home gift for the Mom to be! I have to take a second to just write about my obsession with Hobby Lobby! Not only is it A-M-Azing!! But they have the best deals and they are always having sales. I bought these glass drink containers (3 large and 3 small) for originally $22.50 for ONLY $11.50! There glasswares go on sale about every three weeks so I snagged these jars, perfect for the drinks. I had to bling them out of course! My sister wrapped them in burlap and made the felt flowers. Then we tied on the drink labels with twine. I’m in LOVE.
Drink station: Garden Party

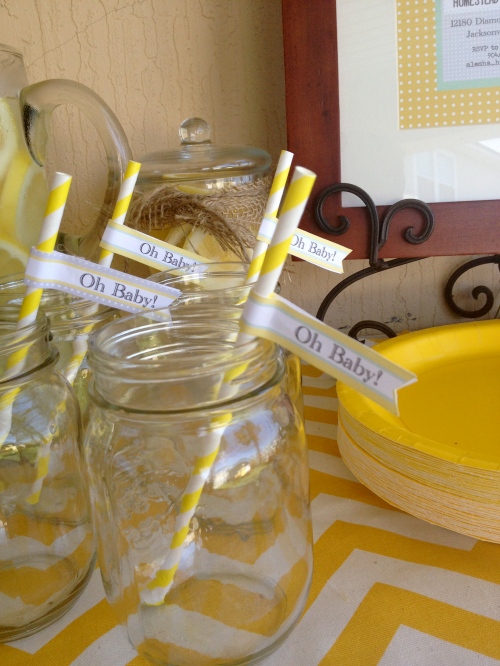
I also created these drink flags for the mason jars. It’s really convenient that I am a graphic designer and have an etsy store with party decorations :).

Made with Love: Drink Flags DSCN0565_2 DSCN0593_2

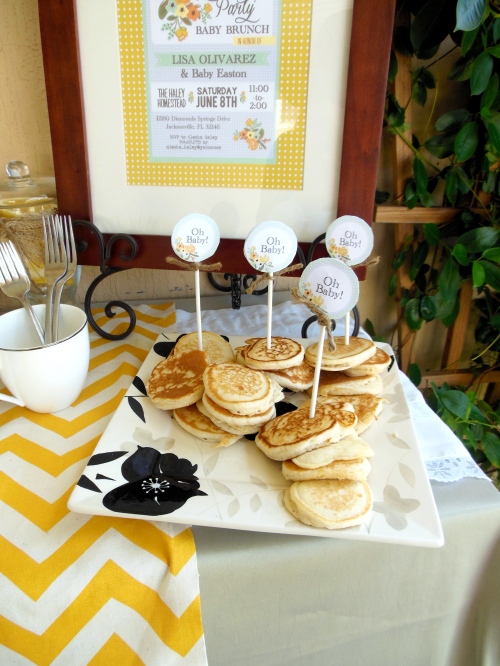
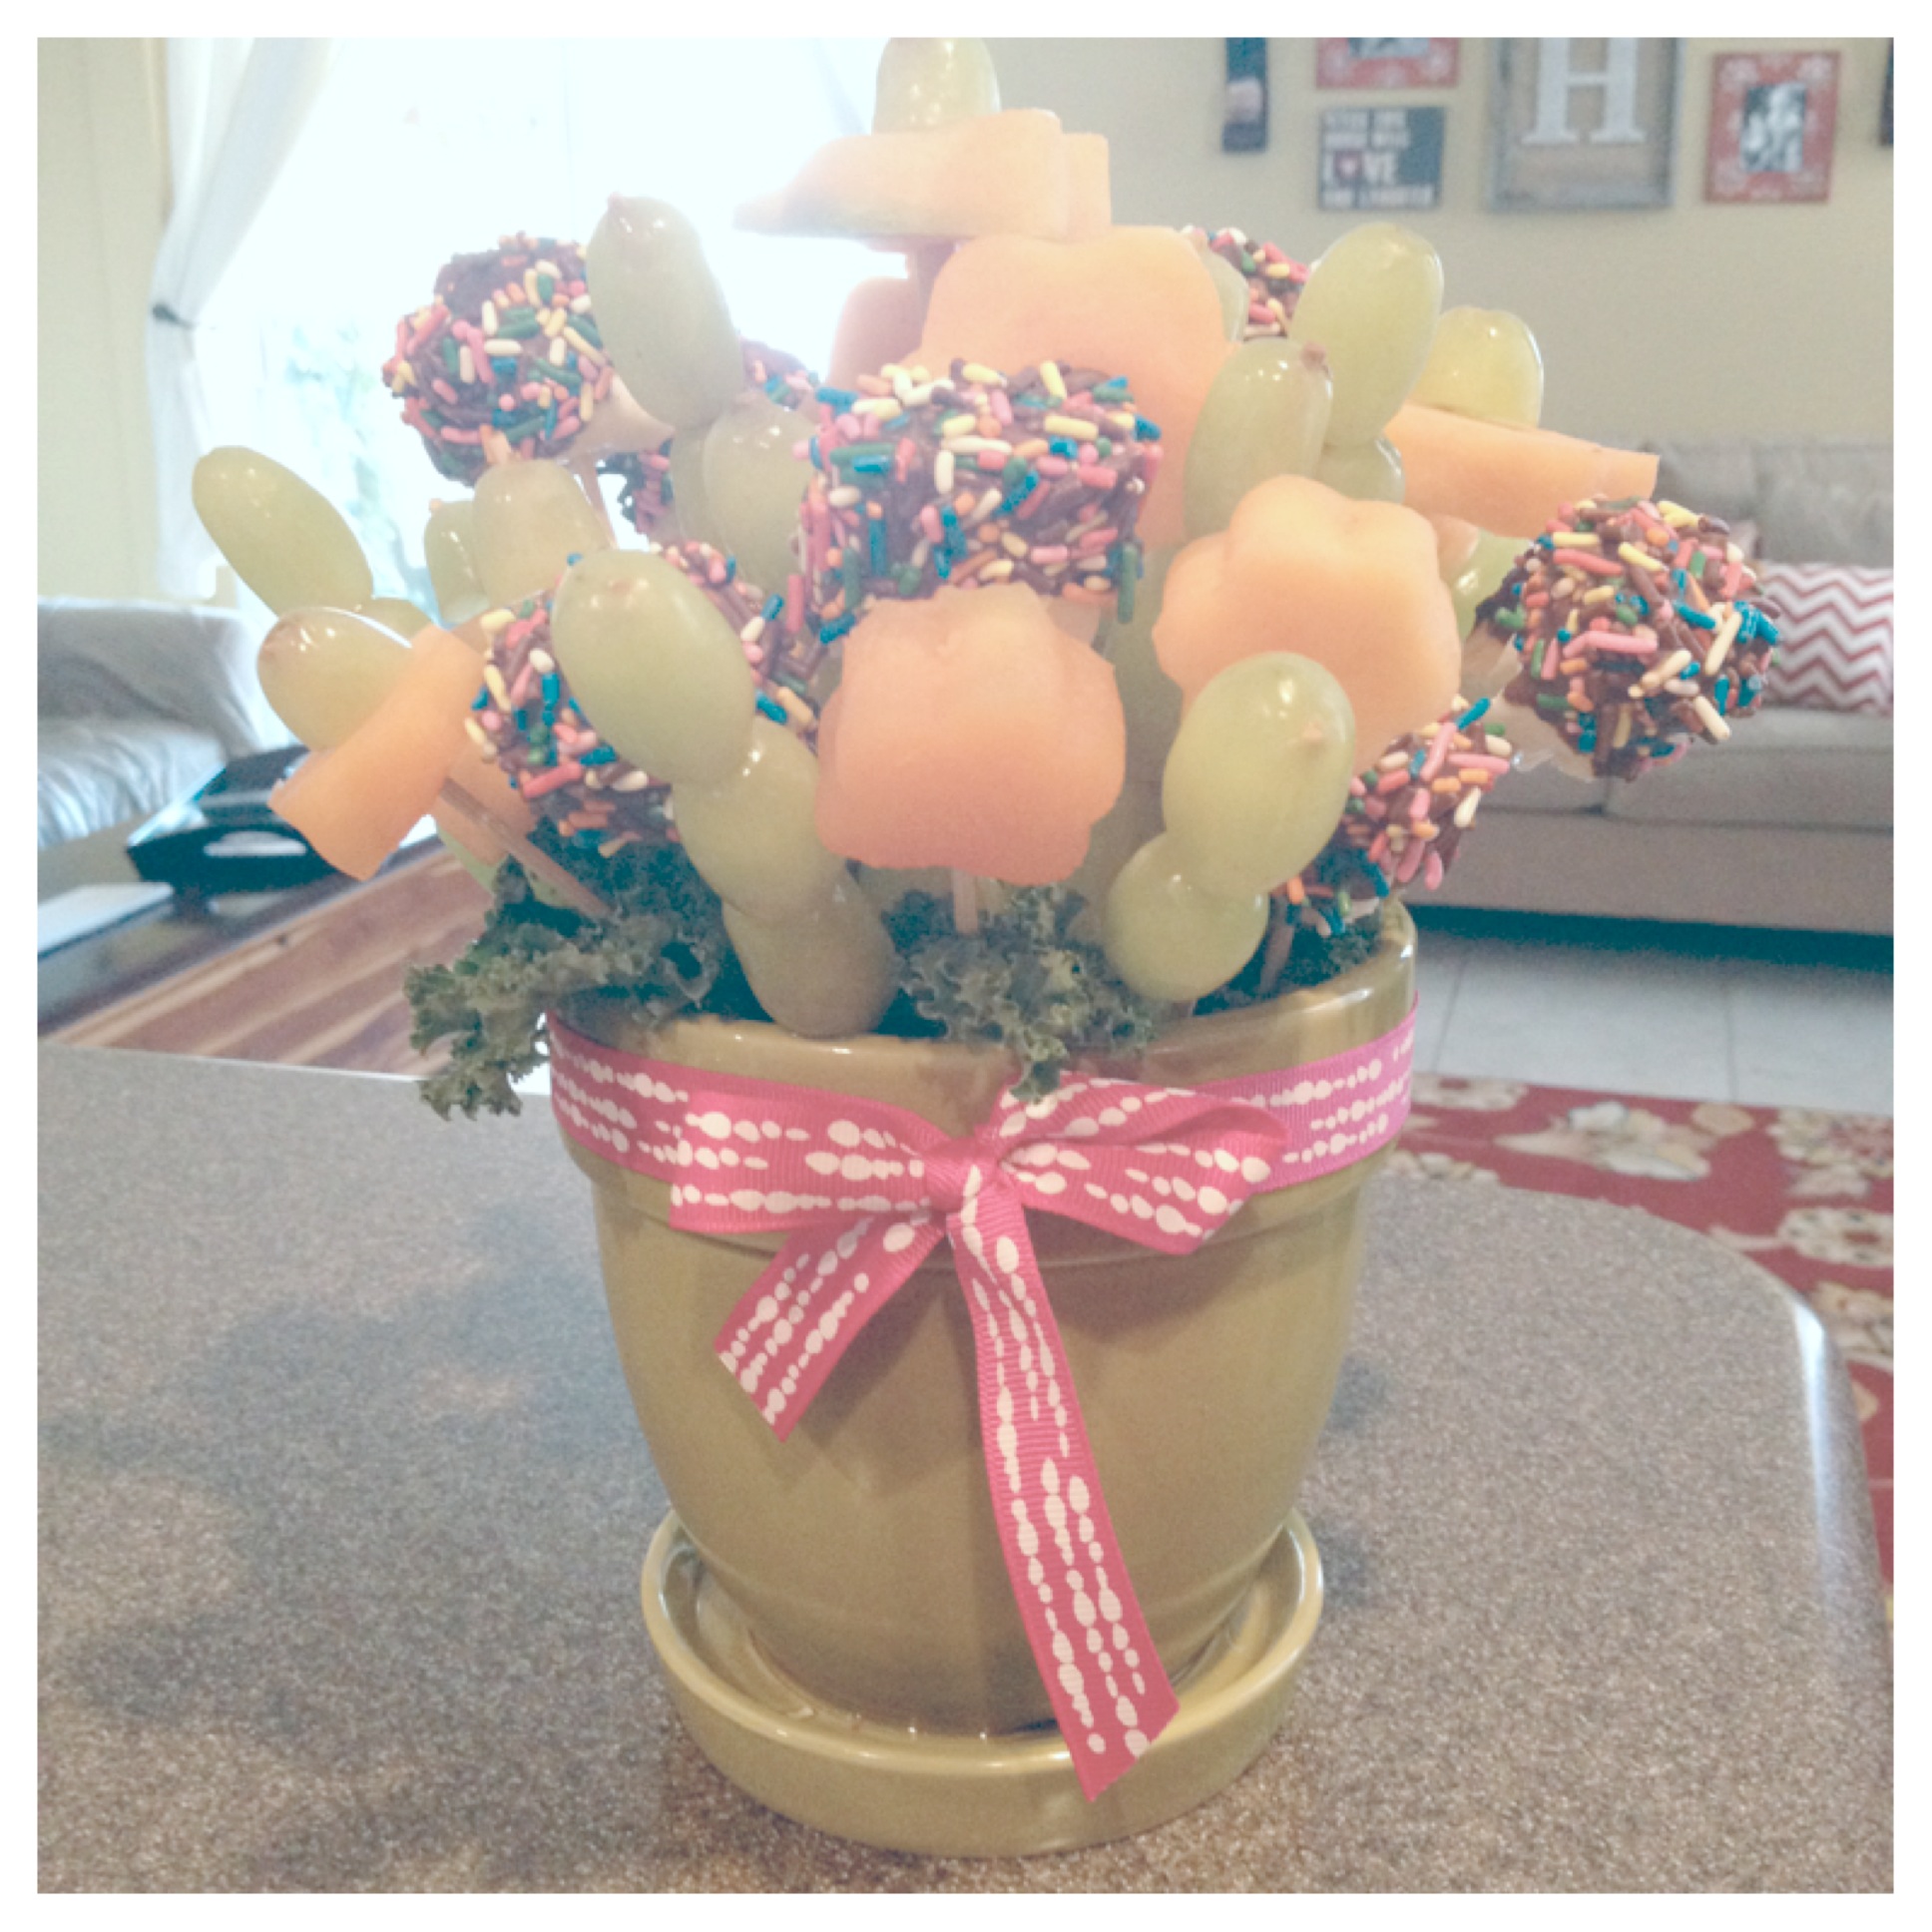
Okay so moving on to the food.. shall we? And this was really the main reason I was up till 3 am the night before. I wanted everthing homemade. I have a problem I know.. It would have been easier to just buy premade pancakes, or premade quiche, but I do LOVE cooking so I thought well its not that much work.. I just kind of forgot about the part where I had to clean my entire house and put up decorations and the party was at 11AM. I do it to myself, I know.. but I just love being involved in every detail.. and I truly enjoy it (I do! even though I totally complain about it, the process really is enjoyable) For the menu I had: spinach & mushroom quiche, mini pancakes, yogurt parfaits, baked bri pastry, watermelon pops & cake.
Made with Love: Brunch Menu DSCN0579_2 DSCN0592_2 DSCN0581_2 Made with Love: Yogurt Parfait's in mason jarsphoto-11
Made with Love: Mini Pancakes for Garden Party

And now for the cake. Usually I am a BIG fan of cupcakes for parties, but for some reason I just really envisioned a cake at the party. My plan was to make a lemon cake the night before but as you know there was alot of other things to do too! So I bought this premade Chocolate Cake from Costco.. and I have to say OMG SOOOO GOOD! It was probably better than anything I could have made anyway. I did however make the burlap & felt mini flag banner as well as the “washi tape” flags that were on top of the cake. So that counts for something, right?!

Made with Love: Chocolate Cake DSCN0515

Overall the party was amazing! Everything turned out perfect and with the beautiful Momma and all our friends it really was a great day! I always enjoy some girl time, but add some coffee and talk about babies and Im in Heaven :)..

DSCN0584_2 DSCN0583_2 DSCN0608DSCN0620 IMG_4604 DSCN0572_2 DSCN0607

Made with Love: Garden Party IMG_4605

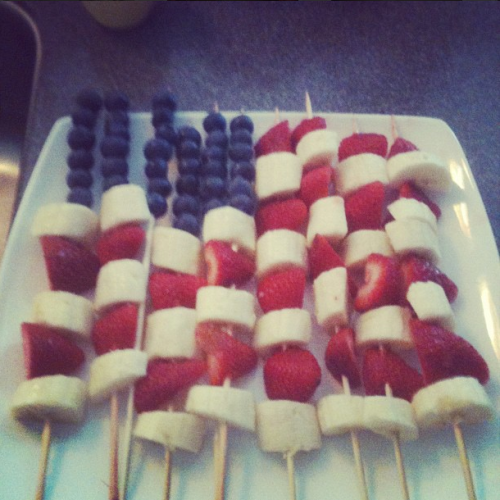
Mason Jars & watermelon on a stick.. talk about Southern Ya’ll!!
IMG_4606

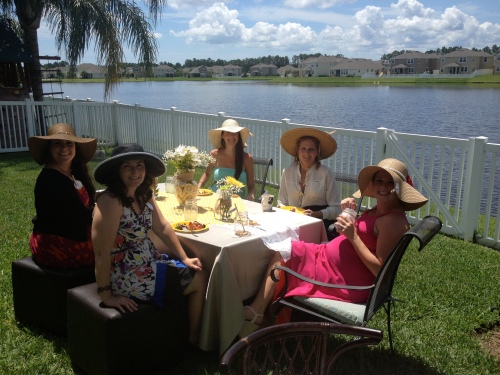
Game Time! Im usually not a fan of cheesy baby shower games, but these really fit! The first one, was just voting for the cutest Big Hat.. which was quite hilarious seeing everyones hats.
Made with Love: Big Hat
IMG_4634
And the second game was a simple “matching game”.. but it gets quite entertaining when you hear everyones answers!
Made with Love: Baby Shower Game
Made with Love: Garden Party
Yay! My Aunt won for cutest Hat! The gift: redneck wine glass of course!
IMG_4626

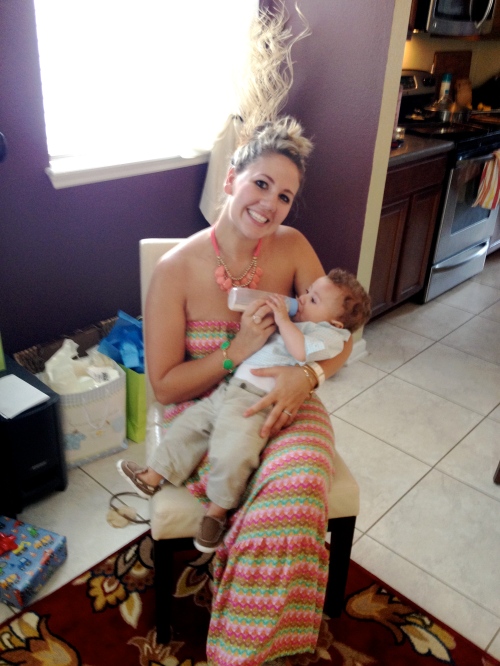
My amazing sister with my adorable nephew Cadeyn!

IMG_4642
The only man among these women..such a cutie pie!

DSCN0598IMG_4664 IMG_4670
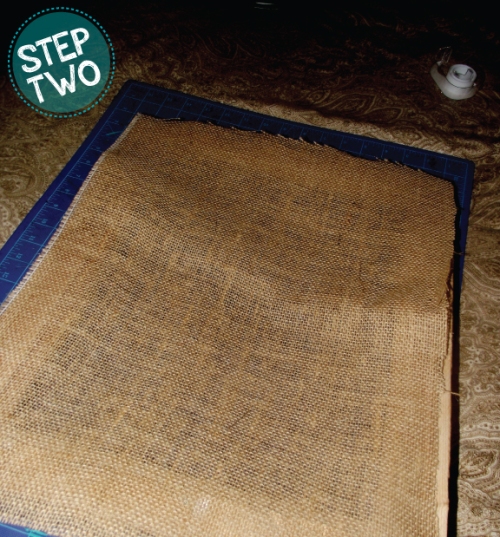
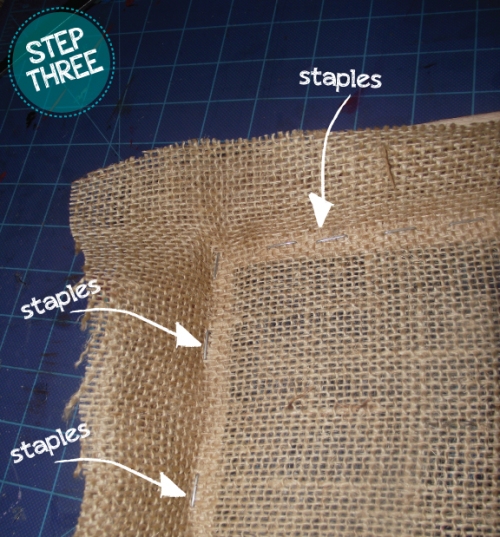
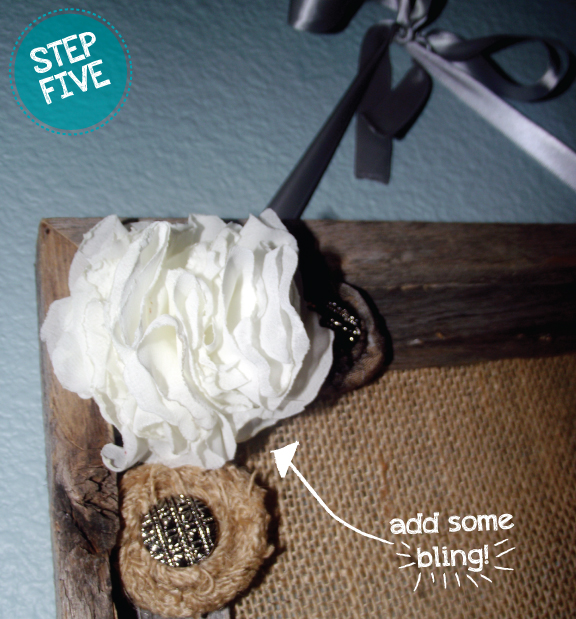
I knew I wanted to give her more than just baby clothes so I made this custom nursery art, printed on Burlap, to match Baby Easton’s nursery. I absolutely LOVE the way it turned out.

Printed on Burlap frame
I absolutely LOVE these ladies.. each and every one of them! They are all amazing and sooooo great to have in my life! I am so blessed to have friends NEW & OLD.. Love celebrating a NEW baby with great women.
IMG_4684
Three beautiful Prego Mommas!

IMG_4689
My amazing sister, and cousins (who are.. lets be honest, practically my sisters)
IMG_4696

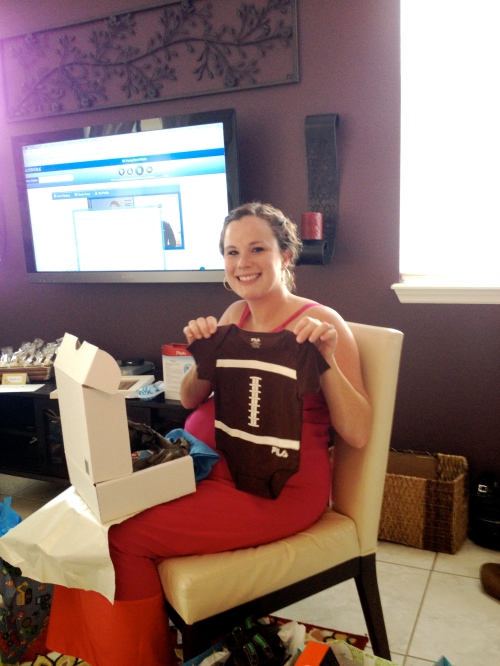
The beautiful Guest of Honor with her Momma! Love these ladies so much!
IMG_4707

Me with my beautiful Momma and amazing sister WHO SERIOUSLY HELPED me pull off this party!! THANK YOU!!
IMG_4710

Sunshine Garden Party Baby Shower Invite: Baby Shower Invite
Drink Flags: Etsy Listing Drink Flags
Party Decorations: Myself and a HUGE help from my amazing sister!

Happy Birthday.. now eat some fruit


securedownload-2
This past weekend was my neices birthday party. I wanted to bring an appetizer but the idea of adding more cupcakes to the already-hopped-up-on-sugar children, seemed like a bad idea. I thought fruit would be a good snack and if it was “cute” maybe the kids would want it more than the cupcakes.. Okay who am I kidding.. what child doesn’t want cupcakes. BUT the fruit boquet was a hit! And was ALL gone by the end of the party. I guess kid’s liked it afterall.

securedownload-3


I have to say I was really intimidated of this idea at first and thought it was going to be SUPER hard. It wasn’t necessarily “easy” but once you get the hang of it, its smooth sailing. And I do apologize I didn’t take any pictures of the “in progress” action.
securedownload
AND see that adorable mermaid cake in the picture.. her Dad made it. YES her dad, it came out sooo cute and all the kids loved it!

Supplies Needed:
-Fruit ( I used one large cantalope & a bag of grapes)
-vase or container for your boquet
-ribbon for accent
-dipping sticks
-styrofoam base to stick your fruit into (I used a 4″ one from Micheals”
-kale or lettuce to “fill the vase”
-cookie cutters – I used flower shaped ones

So all you have to do is slice flat peices of your fruit. Honestly cantalope was hard to  work with, trying to get the slices to have enough “flesh” to fill the cookie cutter was annoying, I might use watermelon next time. But just cut your shapes out, then use grapes to stick either in the middle or on top of them. Push with the stick and insert into the styrofoam base. Now do this about a hundred times..haha maybe not a hundred but at least 30. I also added chocolate dipped marshmellows too.. because come on, you have to have a little chocolate in the mix! Once you fill your entire vase just insert small peices of kale or lettuce into the base to hide your styrofoam. I tied a pink ribbon to finish it off. And there you have it! I’m definitly going to be doing this one again.. maybe I’ll take more pictures next time 😉

securedownload

And now for my love of Chevron…


On my 18th birthday David bought me a sewing machine.. which I had asked for.. and was absolutely elated that I got my dream gift!
Made with Love: Sewing Sunday

For the past 6 years I have “self-taught” myself to sew. Granted I can only sew a straight line and that is really only due to the fact that I spent hours on youtube trying to figure out how to thread the stinkin bobbin. WOW.. was that WAY more difficult than I thought it was going to be.. Have people never heard of zoom feature on their video camera’s.. “I can’t see how your threading your bobbin when its 5ft away from the camera” OMG I thought I was going to freak when I finally found a video with a simple tutorial and a zoomed -in feature.. Um YAY! small feat for me.. but It finally made using my sewing machine an actual option.. I no longer have to sew my pillows by hand (who would do that.. its takes SOOOO long.. & it doesnt look good.. ha did I just rat myself out?! needless to say my house is happier with my new fancy schmancy sewing skillllzz!!

Made with Love:Sewing Sundays

Until all my hopes & dreams came to a crashing hault TWO YEARS ago when I lost my bobbin case.. What’s a bobbin case you ask.. O the little -itty-bitty metal case which holds your thread to do the actual sewing. When I contacted the manufacturer “O we don’t make that model anymore.. UGH” So for two years my precious little sewing machine has sat in my craft closet, just taunting me.. I never thought I could actually find the mysterious bobbin case. Well a couple weeks ago I went online casually seeing if I could find a universal bobbin case… OMG I FOUND ONE! And guess what, it wasn’t a million dollars, a measly $4.99. Did I seriously waist countless craft projects on a $5 dollar bobbin case?! SOOOOOO I bought it and 2 days later my missing craft peice was in the mailbox.. “AAAAHHHH” let the craftin resume.. Can you tell I’m excited? Its the little things in life, right? My world felt complete, okay I’m a bit dramatic, but thats why you love me, right?! securedownload-1I bought this red chevron fabric from Hobby Lobby 6 months ago, thinking it was way too much but maybe I could use it for some scrap project. And then on a rainy Sunday I decided I needed a dining room makeover, you know, because thats a normal thought. I broke out my trusty dusty sewing machine and made a new table runner, placemats and some super cute pillows!

securedownload-13
Okay so I bought a plain red table runner from Marshalls for $5.99. And added the chevron fabric to it. So Maybe it wasn’t from scratch but I LOVE it. It looks so cute in our dining room and it adds a special splash of something 🙂 securedownload-3securedownload-4securedownload-7

I may or may not have gone a little overboard and sewn 6.. okay maybe 8 pillows for our living room. But they look cute right?! I am now so excited that I can actually use my sewing machine and conquer my project list I’ve been putting off. 
  securedownload-9securedownload-6

Hey there Cupcake!


So this past weekend was my two neices joint birthday party, the Oldest Emma was turning six and Alanna was turning 4. So I of course used this opportunity to design every aspect of the party with my Sister. I designed a Custom Party Pack for the birthday party and we spent every minute of Friday Night printing & cutting out the decor to make sure the party was Perfect!CUPCAKE_party_blog

Owl Birthday Invitation

The party was a success & so much fun. Although I have to be honest being around 30 children all day with paint and cupcakes made me sooo happy to go home to my quiet house with my husband and one dog (Can you tell I don’t have kids yet?!) haha I had fun though and LOVED watching the creativity of those little kids!

Made with Love: Cupcake Party  DSCN0361DSCN0368  DSCN0389DSCN0394DSCN0402

Here is a link to the Etsy Listing of the Invite: https://www.etsy.com/listing/124610772/owl-craft-birthday-party-invite-digital

and the Matching Party Pack: https://www.etsy.com/listing/124607520/joint-owl-themed-birthday-party?ref=v1_other_2

P.S. The CUTE owl mugs are conveniently from my job at Natural Life. http://www.naturallife.com/teal-owl-mug.html I guess I just can’t escape the popularness (is that even a word?!) of the owl!

DIY Burlap Jewelry Display


jewelry_display
So for Christmas I was trying to think of the perfect gift for my Sister in law. She always looks so fashionable and has the cutest accessories, so I thought a jewelry display would be perfect. And of course I decided to make it myself. This turned out to be a really easy project! In fact it was soooooooo much easier than creating my own wrapping paper, who said that was a good idea?!  Haha 50 presents later, my fingers were pretty sore from making pompom balls. Anyway (FOCUS ALESHA) back to the super cute jewelry holder.

Okay so Supplies needed:

-One empty Frame (Mine was on Sale at Hobby Lobby $8.00)
– Burlap (I had left over from a previous project, but you could buy a quater of a yard)
– knobs (I chose to do 5 knobs, total $6.00)
-A handy husband to install the knobs (this might cost you, but luckily mine was FREE!)
-fabric flowers (once again, I used fabric I already had to create the flowers, but you can buy premade ones at guess where?! Hobby Lobby!)
-ribbon to hang your frame
-Drill to attach the knobs to the frame
-Staple Gun

STEP ONE
So let’s get started. First you want to decide where to place your knobs.

Unfortunately I did not take pictures of this part, because my Handy Husband did it for me! And once there was math involved in making sure they were evenly spaced, I said forget it (well maybe I just said “Hey your really great at this stuff! Could you help me out”) And he did, he’s so great! Did I mention I love my husband, especially when he helps me with projects?! Wow see how easily I get sidetracked.. Okay so once you drill your holes, attach your knobs in place. The knobs I purchased came with washers on the back so they attached really easily.

step_one

STEP TWO
Cut your burlap slightly bigger than the size of your frame. You are going to end up trimming it down, but you want enough extra to cover the entire frame opening.

step_2

STEP THREE
With your frame FLIPPED OVER, facing down, staple your burlap to the back of the frame. You wan to make sure it is at tight as possible. Also you do not have to use burlap, you could use any fabric of your choice, it just has to be thin enough to attach your earrings to it. You want to staple all 4 sides of your burlap to make sure it’s secure.
step_three

STEP FOUR
So once you have your burlap stapled to the back of your frame, next you will want to trim it down. You want to make sure you cannot see any of the burlap from the front of the frame.

step_four

STEP FIVE
Next you will want to add some pretty accents to your frame! I chose to hang mine with ribbon. So I attached two peices of ribbon to the back of the frame and tied them into a bow. I also made some fabric flowers and hot glued them to the corner of the frame. You could buy premade flowers from any craftstore.

step_five

DSCF6300

And there you have it! Easy, right?! So this is where I ended up really LOVING how it turned, and decided I wanted one for myself too. And luckily I have an awesome husband who made ME one for Christmas! I then added some flowers and the ribbon to it, and it fits perfectly in our bedroom. I love this so much I am thinking about selling them on my Etsy for people who don’t have the extra time to make them.. good idea right?! We will see 🙂 Happy Crafting!

photo-2
This post was featured on Curbly : 25 Easy DIY Jewelry Displays

My husband is now selling these on ETSY!! Get yours today 🙂


Brown paper packages tied up with string… DIY wrapping paper


Christmas is only a week away! I can’t believe it. Where in the world has this year gone. Not only am I still buying presents, but my grand intentions of handmaking everyon’s presents this year, is suddenly becoming nearly impossible. SO plan B.. handmade wrapping paper. If I can’t handmake the gifts, I can at least give the presents in cute little paper, right?! I absolutely love how these turned out, and I just might have to do this for all my gifts from now on. I saw a similar idea on Pinterest and thought I would give it a try!

Supplies Needed:
-roll of kraft paper (3o ft roll was $3.99 from Hobby Lobby)
-White Paint Marker
– Silver Metallic Pen
– Black Sharpie Marker

*Optional
-different colored yarn (for pom poms)

wrapping_paper

Step One
-Draw simple snowflake shapes
step_one

Step Two
-Add small “arrow” shaped lines to your snowflake shape

step_two

Step Three
– With your white paint marker and metallic silver marker, add detail lines & dots.
There is no wrong way to do this, I just eyeballed where I thought need more\less  snowflakes.

step_threeDSCF6307

And there you have it! Happy wrapping! I also used yarn to create cute little pom poms on each package.

NOTE: this is very time consuming, each present took about 45 minutes from start to finish, BUT I think it is  totally worth it! But next year I might start the day after thanksgiving instead 🙂

step_4

DSCF6308DSCF6304

Dollar Store frame… MAKEOVER


Last weekend I had a girls night & decided to give my dollar store picture frame a makeover. I was recently at Peir 1 and saw a felt flower picture frame, for $45.00! I don’t know about you but I am cheap and crafty, so I grabbed some felt and went to cutting and glueing! The entire project costs a total of $4.00, not too bad right?!

-$1.00 picture frame, -$2.00 for the bag of marbles, – $1.00 for 4 sheets of red felt (8 x 10), and I already had the hot glue and scissors.

Step ONE: use your current picture frame, any size will do.

STEP TWO: Take your felt peices, and cut as many circles as you can.. I just free handed the circles and cut them out, but you can use the cap to a jar or the bottom of a paper tube to trace your circles.

STEP THREE: Cut your felt circle in an inward spiral. In the shape of a snail.

STEP FOUR: Roll the flower up starting from the inner curcle to the outer edge. And then hot glue the nd of the flower closed. Now this next step is optional. To give the flowers a more unique look I took a lighter and lightly singed the top of the flowers, it gives them some nice dimension.

STEP FIVE: Repeat about 500 times, well maybe just about 3o times, just enough to cover the front of the frame & the sides.Once you have created enough flowers to completely cover the frame (do not cover the bottom so that the picture has a flat surface to stand on), then glue them one by one onto your frame. I chose to cover the 3 sides as well.

And once I had the frame covered I added clear pebbles from hobby lobby ( only $2.00 per bag).

So total cost of the project was $4.00 which is pretty good compared to a $45.00 frame 🙂

Happy crafting!!

Good night Love


I recently felt inspired to give my guestroom / office a mini makeover. One of the first projects I tackled was the artwork. I created this canvas night light that I “LOVE”.. get it?! It’s one of my fave craft projects, because it looks great during the day and at night. It was incredibly easy and only took about an hour and a half from start to finish. I wish I could take credit for this idea, but of course I found it on Pinterest. Follow the original tutorial here  How to: Glittering Night Light.

STEP ONE:
First buy your canvas any size, mine was 24″ x 36″. Draw your design in pencil, I used the infamous “LOVE” shape for my design. You can free hand your design or print out a pre made shape and trace it onto the canvas. You could easily do a simple flower, animal silhoutte, etc.

STEP TWO:

Fill in your pre traced design with paint. This took about 2 coats of acrylic paint. I recommend letting each coat of paint dry for about 30 minutes, otherwise it gets goopy (do you like my very formal terminology). And you want it to be a smooth even coat.

STEP THREE:

Poke a hole in the canvas using a phillips head screwdriver. You can eyeball the placement of the holes, Or I drew them on about every half an inch with a pencil first. If you dont want to use a screwdriver, you can use an aull, but I didn’t have one so the screwdriver was the next best thing. I used a small pencil at first and gently pressed against the front of the canvas to make a small hole and then went back using the screwdriver  on the back side to create the larger holes. The screwdriver makes the perfect size for your christmas light bulbs to fit through. Now you have to make sure the light’s dont fall out. I used a small dab of hot glue on the back of the canvas on the outer rim of each hole, then lightly pressed the christmas bulb in place. Repeat this step for each hole. (Note: do this with the christmas lights off.. the picture is showing the placement only.. but you knew that already didn’t ya!)

NEXT: Plug in your lights and enjoy! Easy right?! I just hid the extra lights behind the dresser, but you could easily tuck them all into the back of the canvas leaving just enough cord to plug in. Hope you enjoyed my tutorial and I didn’t confuse you too much 🙂

Baby Bump Party


Image
Baby Boy Invitation

So this past weekend I threw my sister & brother in law a couples shower! I have to say it was so fun and having guys and girls there made it really hilarious! This is my first nephew and I wasnt sure how to decorate or style the party for a boy. With a little help from Pinterest, I was able to use baby blues and mustaches to accessorize! I made all the decorations and worked on every detail so everthing would be perfect! I have to say it was so fun.

The photobooth was great. I cut all the props out of felt and hot glued them to popsicle sticks. It was so great and the perfect photo opportunity!

Image

Image

Image

Image

I followed this tutorial to make the baby washcloth lollipops for my baby nephew. They were super easy and everyone loved how cute they were!Image

We played the game “mom or dad” which was perfect for a couples baby shower. We came up with 20 questions each answer was either the mom or dad. The guests would hold up a mustache if they thought the answer was for  the dad and they would hold up a pair of lips if they thought the answer was the mom. It was hilarious to see peoples answers.

Overall it was a great party and I will definitly be doing a couples shower for all my prego friends from now on! Everything was fun and loved seeing the guys reaction to the games & gifts!

The Baby Bump Party Invite I designed is on my Etsy Site: https://www.etsy.com/listing/115174331/vintage-inspired-couples-baby-shower

And the matching party Pack : https://www.etsy.com/listing/119719312/couples-baby-shower-printable-deluxe


Welcome, my name is alesha haley and this is my blog dedicated to some of the loves in my life. Thanks for stopping by!

Enter your email address to follow my blog and receive notifications of new posts by email.

TOP POSTS

Recent Instagram Pics

No Instagram images were found.